It’s a fact that you can use custom icons on Elementor.
When you use custom icons for Elementor, it might be the best way to represent your brand value, most of the users hardly know how to use them.
The good news is, Elementor gives you full control over custom icons.
You can import and modify your own icons as long as you are using Elementor.
Now, let me show you the whole process to use custom icons for Elementor.
Step 1: Get Elementor On Your Site
For starters, you must have Elementor installed with your WordPress website.
Before 2021, people could use custom icons with Elementor for free.
As for the latest version of Elementor, you must get the pro license in order to get custom icons access.
Check this link https://elementor.com/pricing/ to select a suitable package.
Well, let’s now move on to the main step of getting custom icons for Elementor.
Step 2: Get Custom Icons For Elementor
You can make your custom icons and use them inside Elementor whenever you want.
There’s a rule that Elementor scans and checks icon data and determines if it matches their preference.
So, the best way is to get a professional icon developer for this task.
For your concern, you can grab ready-made icons from a website that works for Elementor.
Link: https://fontello.com/
They are free, no matter how many icons you get from there.
Browse Icons
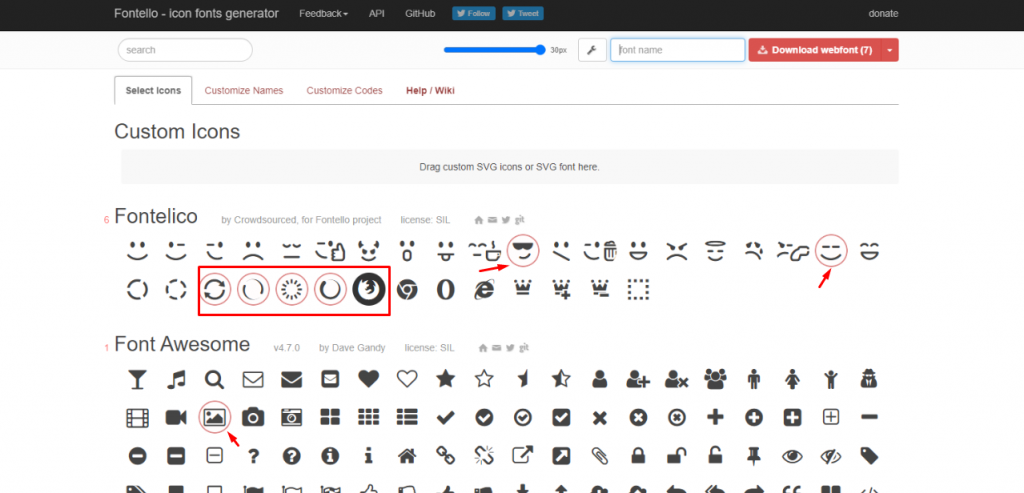
Inside Frontello, search and select the icon you want to bring with you.
There will be a red circle around the selected icons.
Download Selected Icons
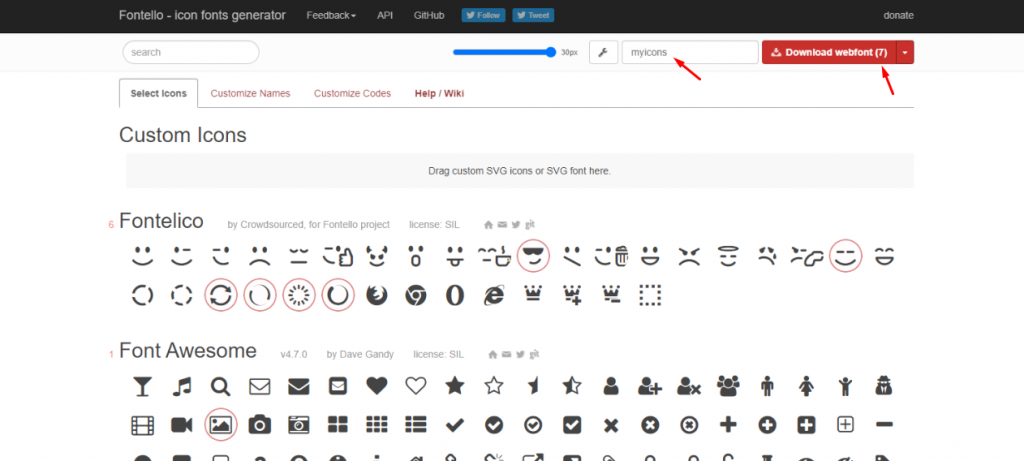
After selecting the custom icons for Elementor, give a name to your icons and click the download button.
You will get a zip file containing the selected icons.
Keep it on your computer as we will upload it soon on Elementor.
Step 3: Inserting Icon Widget on Elementor
To add custom icons, you need to insert an icon widget on your website.
As Elementor has such a widget, you can easily take advantage of it.
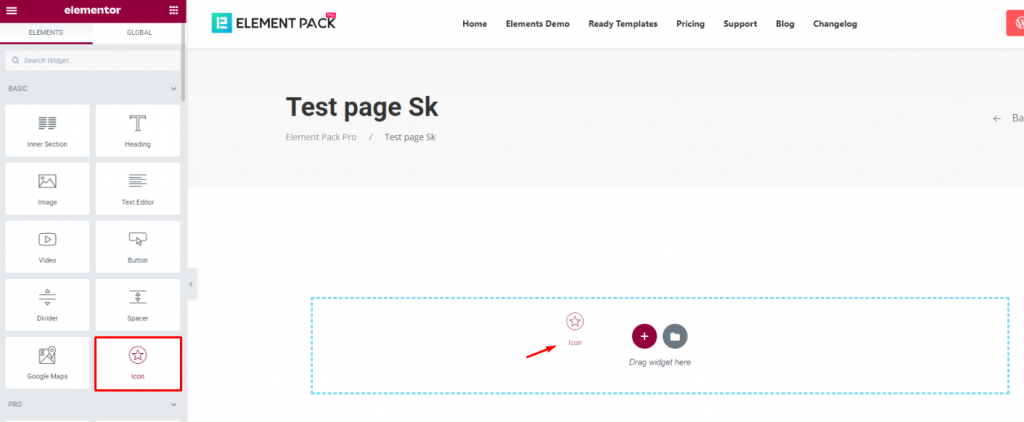
Drag and drop the Icon widget inside your webpage.

Now, click on the icon marked by the arrow.
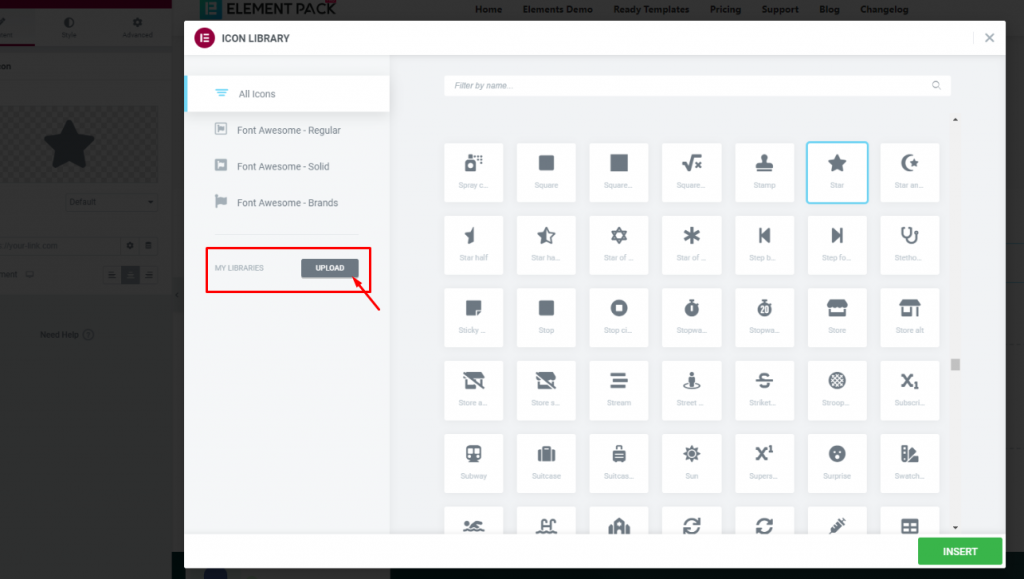
Then, you will see a pop up window named Elementor Icon Library with lots of icons.
Below the category, you will see an Upload button.
It lets you upload your icons in zip file format.
Click on the button.
Step 4: Upload Custom Icons For Elementor

By clicking the upload button, it will take you into the custom icon menu inside the WordPress dashboard.
Remember, you can get here directly without inserting any widgets too.
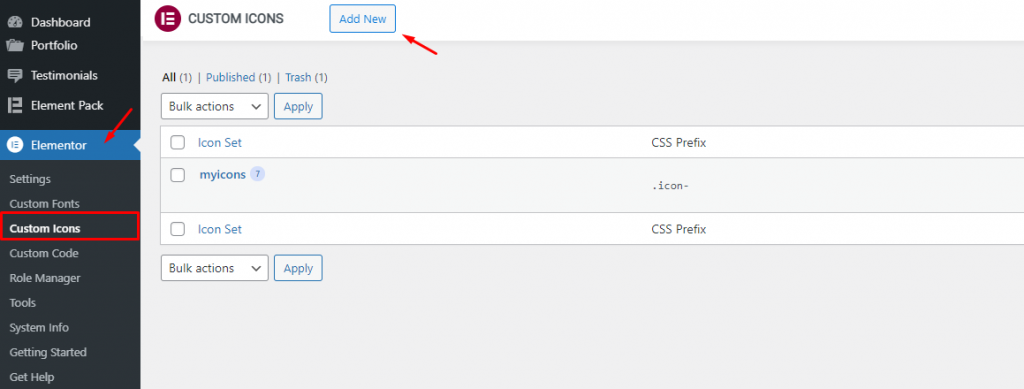
Go to Dashboard> Elementor> Custom Icons and you will see the same menu.
Now, click on the Add New button.
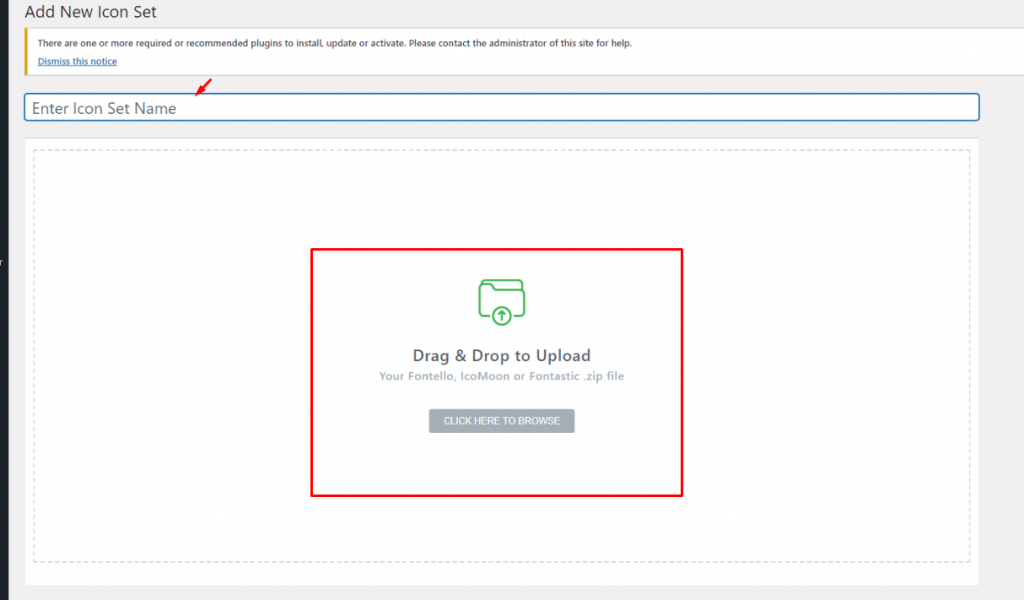
On the new popup window, you will be asked to upload the icon file.
Click on the Browse button.
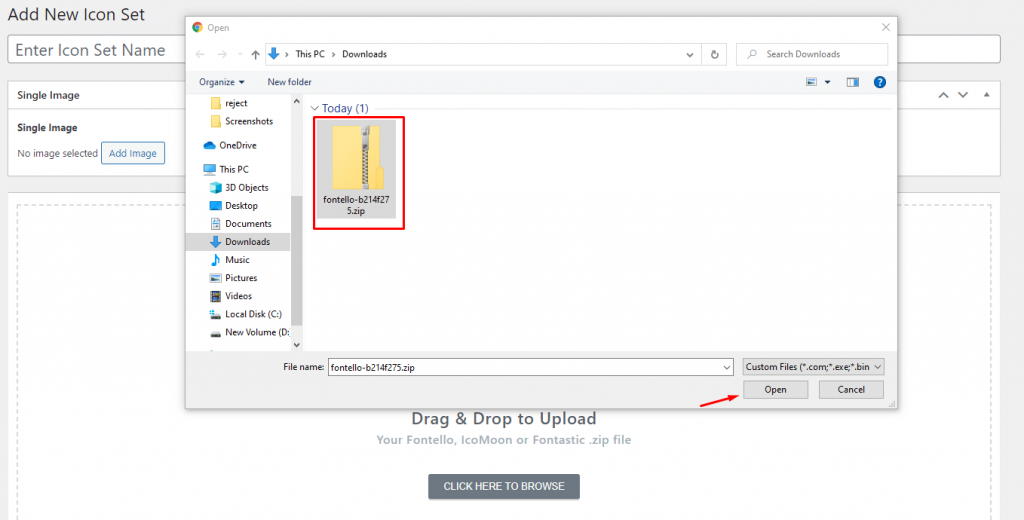
Select the zip file of your icons and click open.
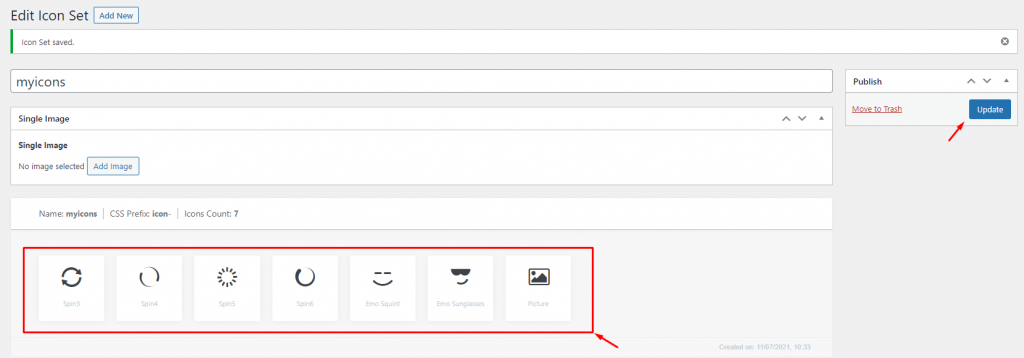
Then, you will see the icons lined up below.
Once again, you can change the name of the icon pack as well as upload an image.
Hit update after any changes.
Step 5: Set Custom Icon
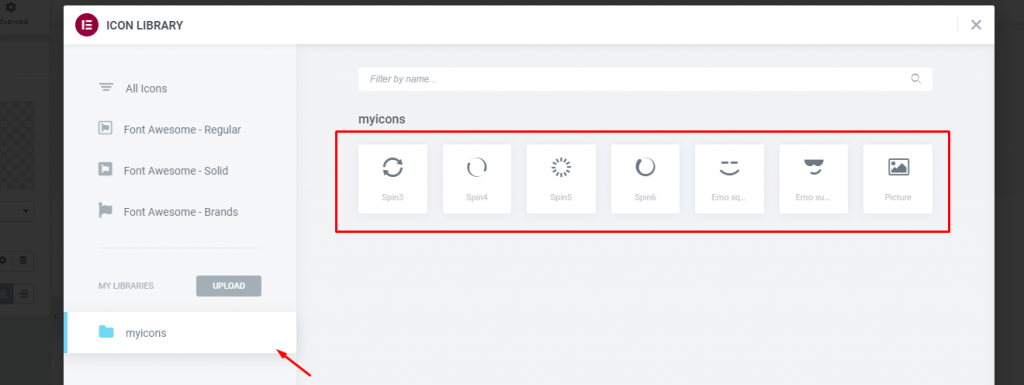
Back on to the page editor, you will see the new custom icon pack below the menu.
Click on the folder and you will see the icons.
Select one and click insert.

The icon will be added to your page and now you can customize it using Elementor.
That’s how you can easily use custom icons for Elementor.
Conclusion
It’s not difficult to use custom icons for Elementor. Or, even, you can easily adds custom fonts as well in your Elementor theme.
Just that you will need to buy the premium version of the plugin for that. You can also use more widgets and Elementor addons to enhance your site.
Hope you have got it now!

