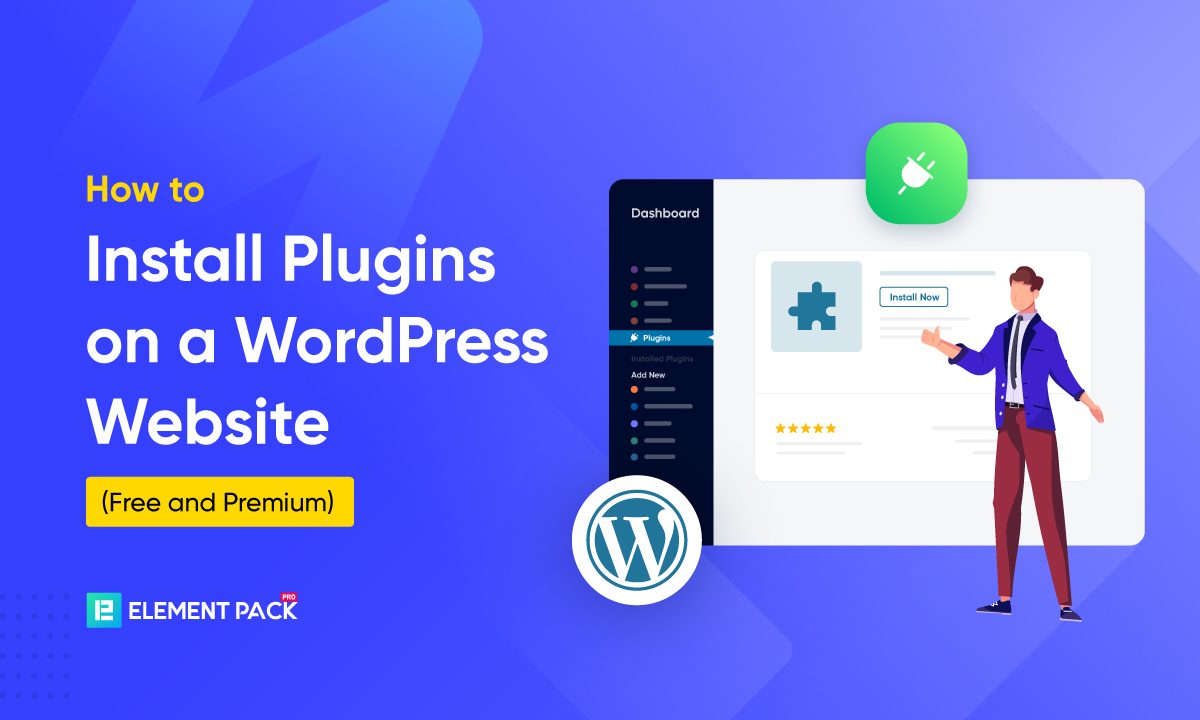
How to Install Plugins on WordPress: A Step-by-Step Guide (Free & Premium)
Without plugins, a WordPress website is just a skeleton. Plugins power over 60,000 functionalities—from SEO to security, eCommerce to design. But how to install plugins correctly?
Many beginners either struggle with installation errors, use outdated methods, or fail to activate them properly, leading to performance issues or security vulnerabilities.
A poorly installed plugin can break your site or expose it to cyber threats. In fact, 39% of hacked WordPress sites are compromised due to outdated or misconfigured plugins. Free plugins are easy to install, but what about premium ones? Or those requiring manual upload or FTP access?
This step-by-step guide to installing WordPress plugins will cover all methods from direct installation to WordPress install plugin manually using FTP. We’ll also introduce Element Pack free and pro, one of the best plugins to enhance your website. By the end, you’ll know how to add plugins in WordPress safely and efficiently.
Prerequisites Before Installing Plugins
Before proceeding with WordPress plugin installation, ensuring your site is properly set up can prevent errors and security risks.
Here are the key steps to take before adding plugins to WordPress:
- Ensure WordPress is Installed and Running
A properly installed and updated WordPress setup is essential for avoiding plugin conflicts.
According to WordPress.org, 43% of all websites run on WordPress, but outdated installations are a common cause of plugin errors. Always update WordPress to the latest version before installing plugins in WordPress.
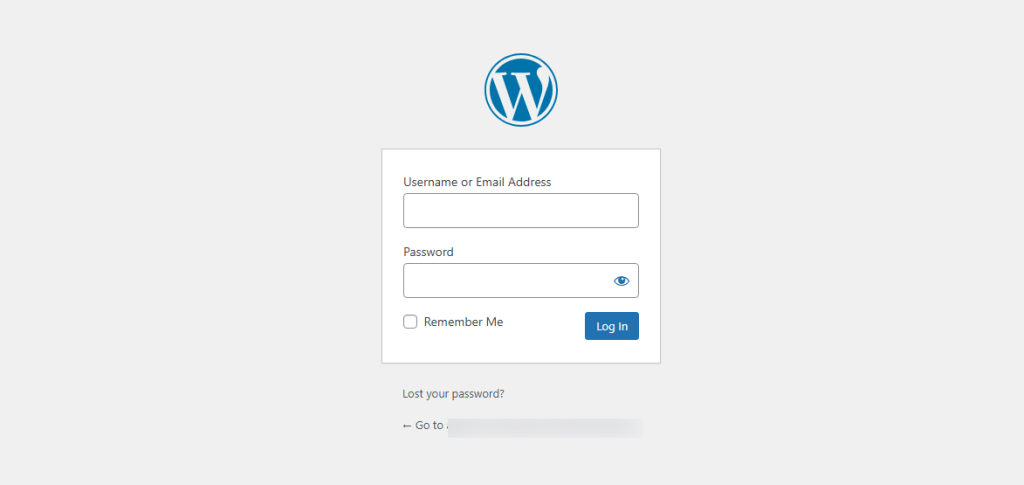
- Have Administrator Access to the WordPress Dashboard
To install plugins on WordPress, you must have Administrator privileges.
If you’re using a WordPress.com site, ensure you’re on a Business or eCommerce plan, as free plans do not allow plugin installation.
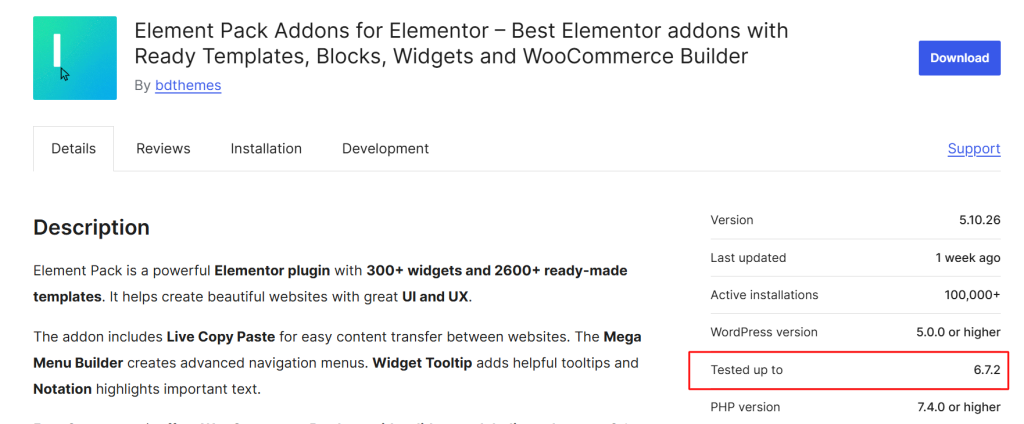
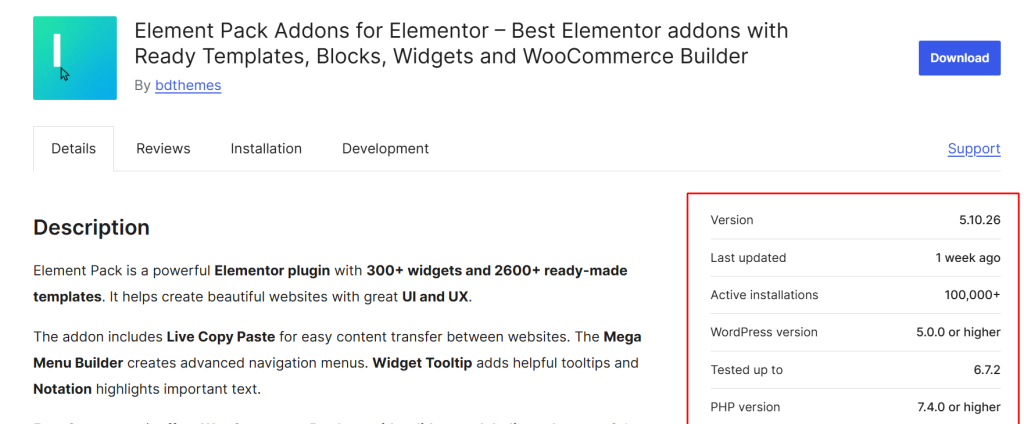
- Check Plugin Compatibility with Your WordPress Version
Not all plugins are updated frequently.
According to WPScan, 52% of plugin vulnerabilities arise from outdated or incompatible plugins.
Always check the plugin’s “Tested up to” version before proceeding with WordPress plugin setup to prevent security risks.
- Backup Your Site Before Installing Multiple Plugins
While installing plugins in WordPress, conflicts may occur, potentially breaking your site. Use a reliable backup plugin or your hosting provider’s backup solution to create a full site backup before manually installing a WordPress plugin or adding multiple plugins.
Once these prerequisites are met, you’re ready to move forward with how to install a WordPress plugin using different methods.
How to Install Free WordPress Plugins from the Plugin Repository (Step-by-Step Guide)
The WordPress Plugin Repository is an official directory where users can find over 60,000 free plugins verified by WordPress.org.
These plugins cover everything from SEO and security to speed optimization and design. Since all plugins here go through a strict review process, they are generally safe to use.
If you’re looking for free and widely used plugins, the WordPress repository should be your first choice. However, it’s essential to check user ratings, compatibility, and last updated date before installing.
Step-by-Step Guide to Installing Plugins in WordPress from the Plugin Repository
This is the easiest way to install plugins on WordPress, as it allows you to search, install, and activate plugins directly from your dashboard.
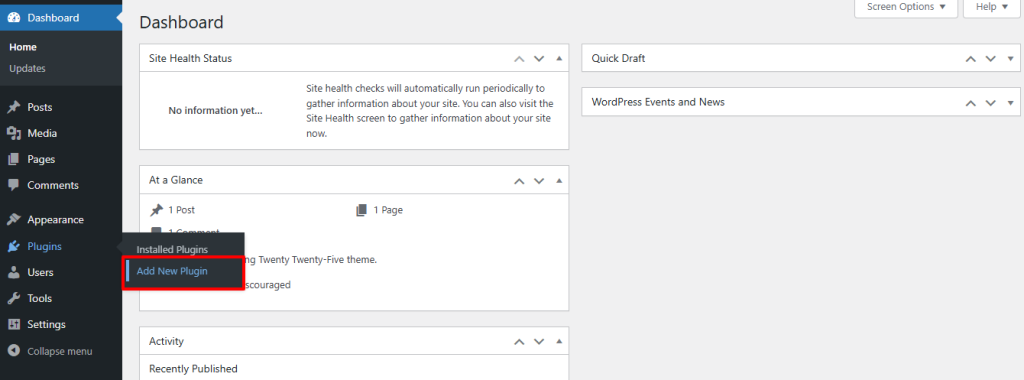
Step 1: Access the WordPress Plugin Repository
- Log in to your WordPress dashboard.
- Navigate to Plugins > Add New in the left menu.
Step 2: Search for a Plugin
- In the search bar, type the name or functionality you need (e.g., “Element Pack” for an advanced addon collection).
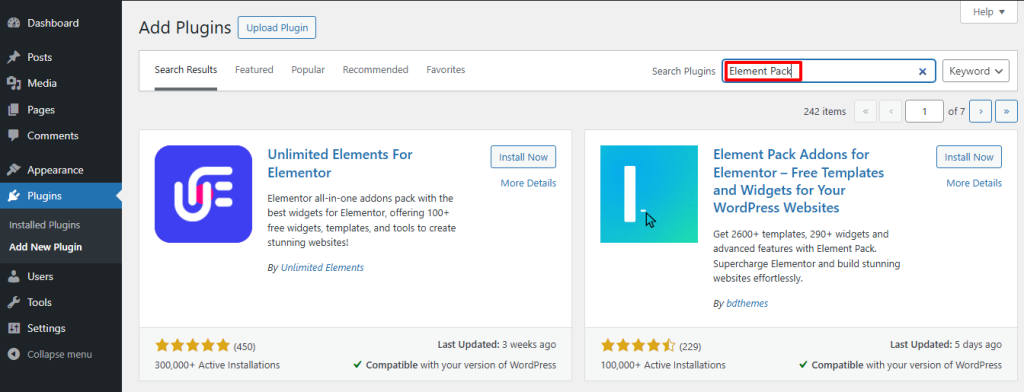
- Look for a plugin with high ratings, frequent updates, and compatibility with your WordPress version.
Step 3: Install the Plugin
- Click the Install Now button next to the plugin.
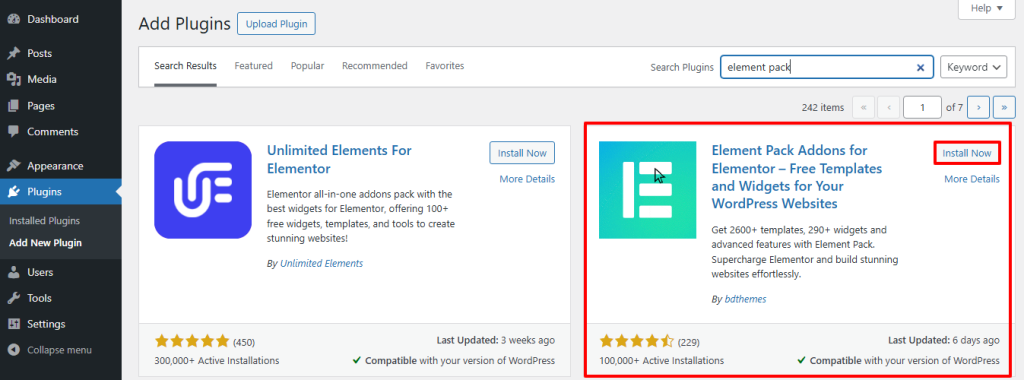
- Wait for the installation to complete.
Step 4: Activate the Plugin
- Once installed, click Activate to enable the plugin on your site.
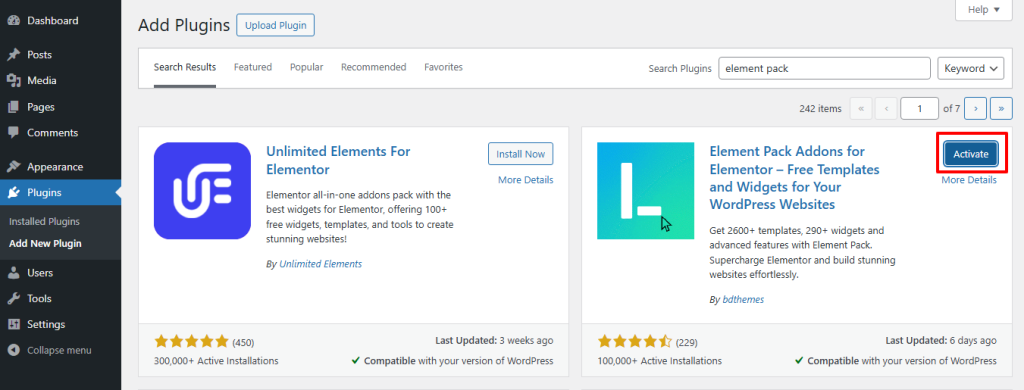
- The plugin is now ready for use.
Configuring the Plugin After Activation
After WordPress plugin setup, most plugins have a dedicated settings page where you can configure options based on your needs.
- For example, Element Pack Free provides customization options under Element Pack in the dashboard.
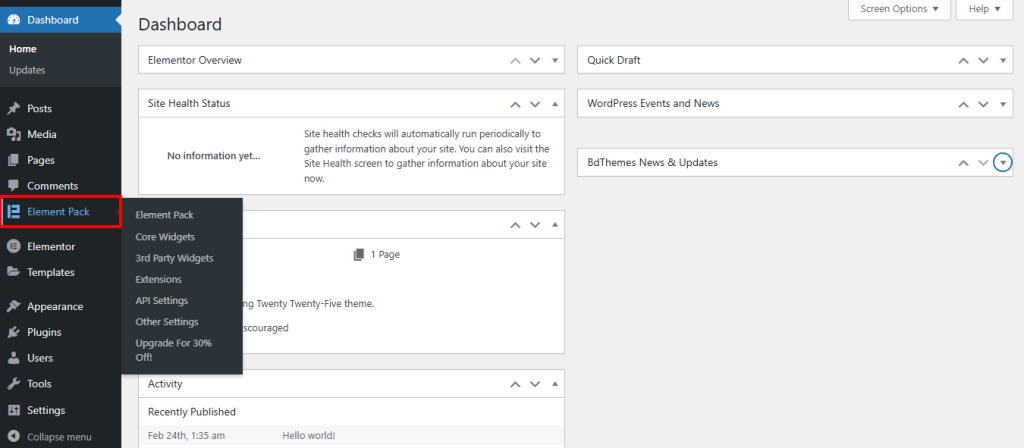
- Some plugins add new menu items, while others integrate into the existing WordPress settings.
Always review documentation or tutorials if you’re unsure about the best way to configure a plugin.
When to Use the WordPress Plugin Repository?
You should use the official WordPress plugin repository when:
- You need a trusted, free, and widely used plugin.
- The plugin is regularly updated and has good user reviews.
- You want an easy installation process without manual uploads.
- You’re looking for lightweight solutions that won’t slow down your site.
While the repository is ideal for free plugins, premium plugins require manual installation, which we’ll cover next.
How to Install a Premium WordPress Plugin
Unlike free plugins, premium WordPress plugins are not available in the WordPress repository. Instead, they must be purchased from third-party sources and installed manually.
Here’s why, where to get them, and how to install them.
Why Aren’t Premium Plugins Available in the WordPress Repository?
The official WordPress Plugin Repository only lists free plugins that follow strict guidelines set by WordPress.org.
Premium plugins:
- Offer advanced features beyond free alternatives.
- Require a direct purchase to support ongoing development.
- Include dedicated support and frequent updates, making them a better choice for businesses.
For example, Element Pack Pro offers an extensive library of Elementor widgets that go beyond the capabilities of free plugins.
Where to Download Premium WordPress Plugins?
When purchasing a premium plugin, always buy from official sources to avoid security risks. The most trusted platforms include:
- Official Plugin Websites – Most developers sell plugins directly (e.g., Element Pack Pro).
- Marketplaces like Envato & CodeCanyon – Platforms that host verified premium plugins.
- Developer Membership Sites – Some companies offer bundled access to multiple plugins.
Avoid nulled or pirated plugins, as they may contain malware and lack official updates and support.
Step-by-Step Guide: Installing a Premium Plugin via Manual Upload
Since premium plugins aren’t in the repository, they must be uploaded manually:
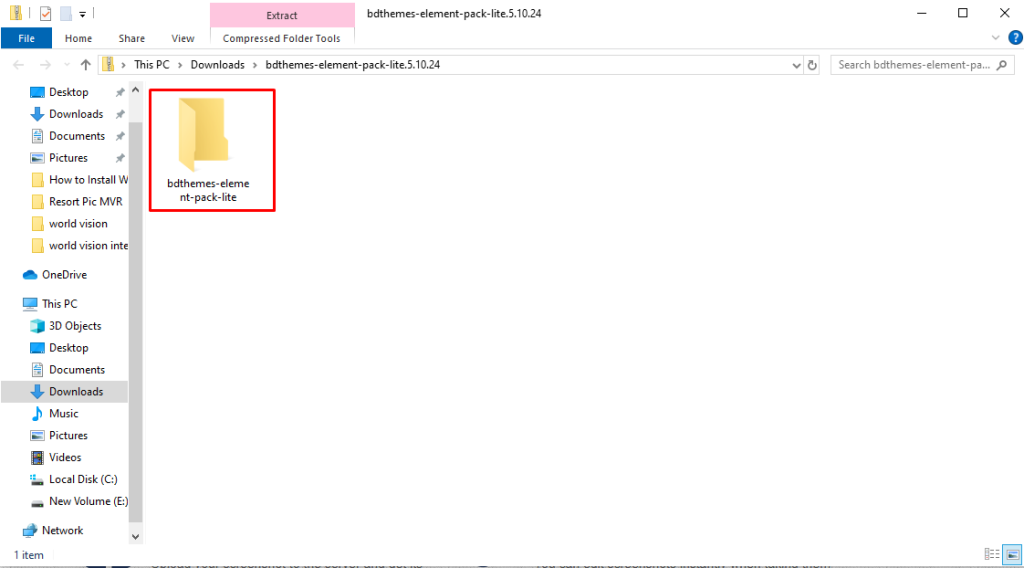
Step 1: Download the Plugin ZIP File
- After purchasing, download the plugin ZIP file from your account on the vendor’s website.
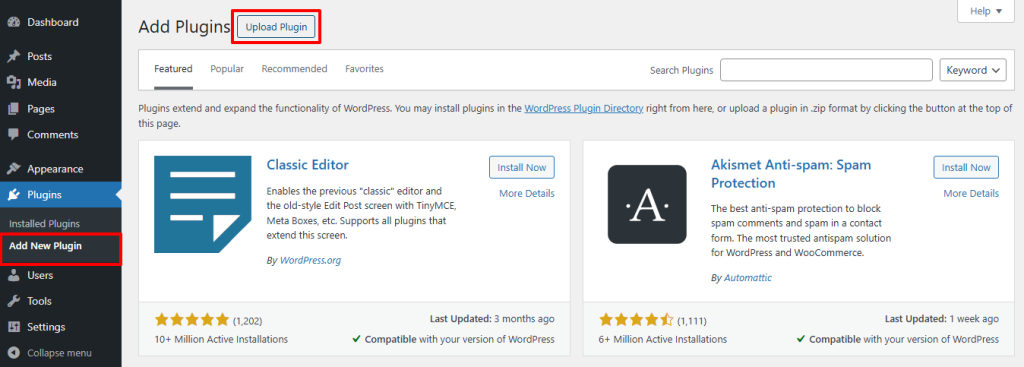
Step 2: Access the Plugin Upload Section
- Log in to your WordPress dashboard.
- Navigate to Plugins > Add New.
- Click the Upload Plugin button at the top.
Step 3: Upload and Install the Plugin
- Click Choose File and select the downloaded plugin ZIP file.
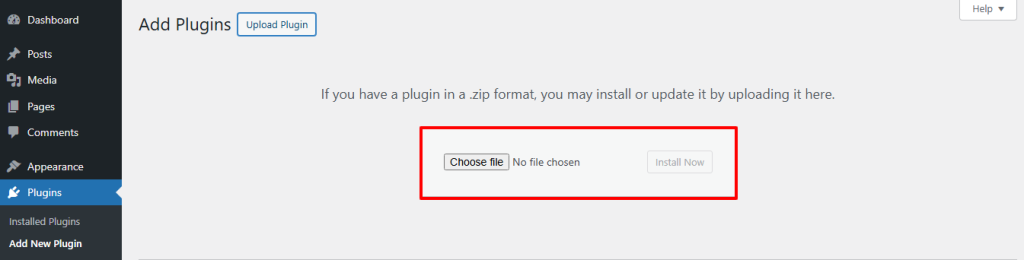
- Click Install Now and wait for WordPress to upload and unpack the file.

Step 4: Activate the Plugin
- Once installed, click Activate Plugin.
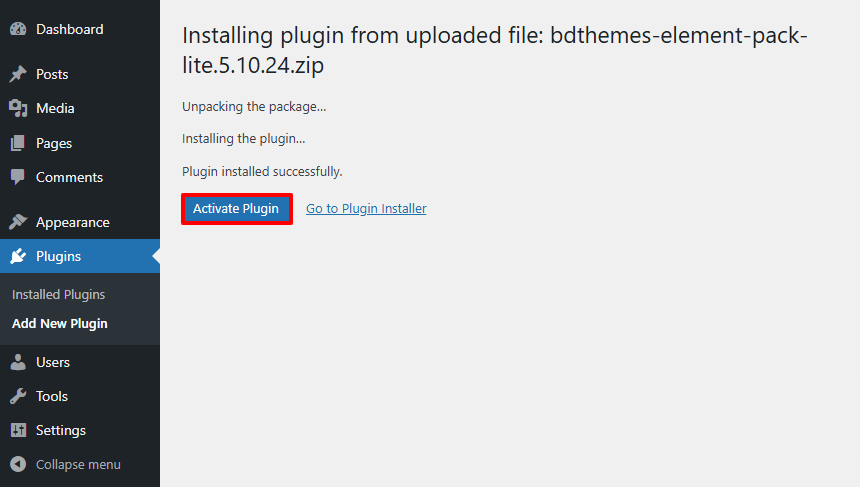
- The plugin is now active on your WordPress site.
Configuring a Premium Plugin After Activation
Premium plugins often come with additional setup steps. Here’s what to do next:
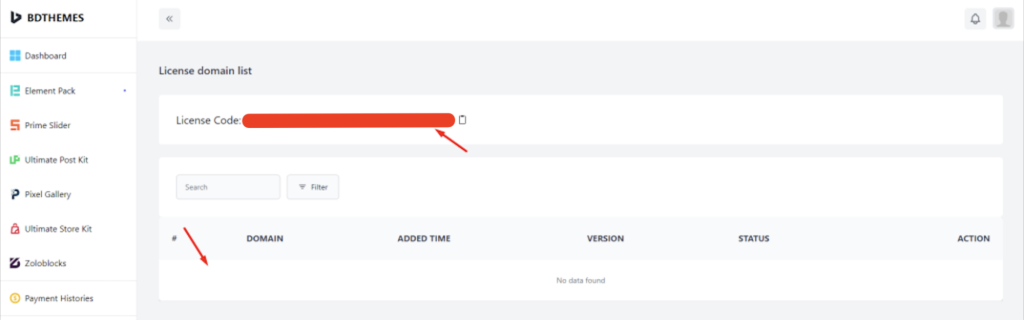
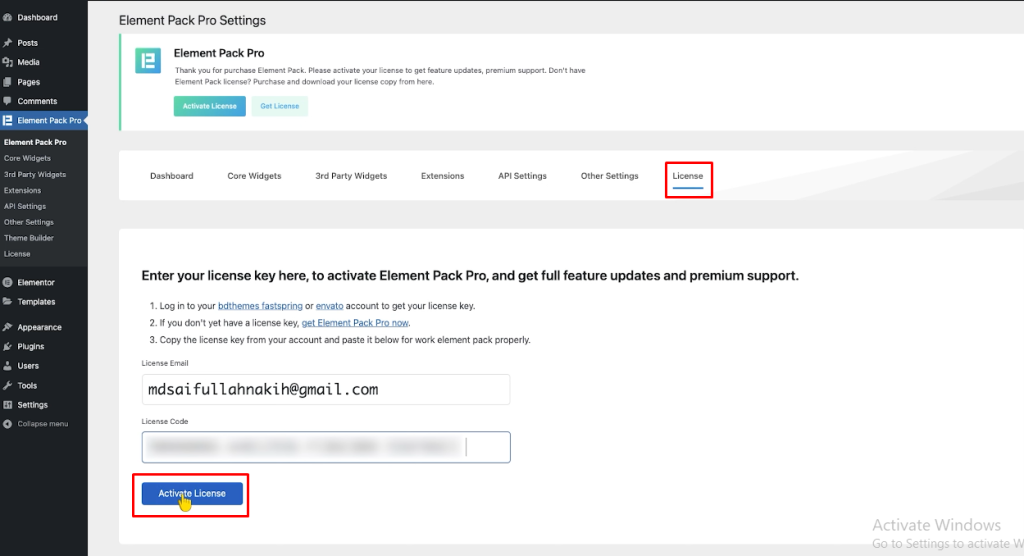
- Enter Your License Key – Most premium plugins require activation to receive updates. You’ll find the key in your purchase confirmation email or account dashboard.
- Adjust Plugin Settings – Navigate to the plugin’s settings page to configure features based on your needs.
- Check Documentation & Support – Premium plugins typically include detailed documentation and customer support for troubleshooting.
For example, after installing Element Pack Pro, you can access its settings under Element Pack > License and customize widgets from the dashboard.
When to Use a Premium Plugin?
- You need advanced features not available in free plugins.
- You want dedicated customer support and frequent updates.
- You’re running a professional or business website and need reliable performance.
Premium plugins enhance WordPress plugin setup with better security, customization, and functionality.
Best Practices for Managing Installed Plugins
Installing plugins in WordPress is essential for adding new features, but improper plugin management can slow down your website and create security vulnerabilities. To maintain optimal performance and security, follow these best practices:
- Regularly Update Plugins to Avoid Security Risks
Why It’s Important:
- Outdated plugins are the #1 cause of WordPress security breaches— 52% of hacked WordPress sites are due to vulnerable plugins (Sucuri Security Report).
- Updated plugins receive bug fixes, compatibility updates, and new features.
Best Practices:
- Enable automatic updates for trusted plugins (WordPress > Plugins > Enable Auto-updates).
- Regularly check for manual updates, especially for premium plugins.
- Before updating, test updates in a staging environment to avoid conflicts.
- Avoid Installing Too Many Plugins
Why It’s Important:
- Each installed plugin adds scripts, styles, and database queries that can slow down your site.
- Poorly coded plugins can conflict with others, causing site errors.
Best Practices:
- Stick to essential plugins only—15-20 well-optimized plugins are fine, but avoid excessive installations.
- Choose multi-functional plugins like Element Pack Pro, which replaces multiple single-purpose plugins (e.g., sliders, widgets, and forms in one package).
- Always test plugin performance with Query Monitor or P3 Plugin Profiler.
- Choose High-Quality Plugins (Element Pack Free vs. Pro Example)
Why It’s Important:
- Not all plugins are well-maintained. Abandoned plugins can introduce security risks.
- Free plugins from the WordPress repository undergo security checks, but premium plugins offer better support, features, and updates.
Example: Element Pack Free vs. Pro
Element Pack Free (From WordPress Repository):
- Basic widgets & elements for site customization.
- Free, regularly updated, and verified by WordPress.org.
Element Pack Pro (Premium Plugin):
- 80+ advanced widgets, premium design templates, and integrations.
- Regular updates & priority support from the developers.
- Better compatibility with Elementor & WordPress updates.
Conclusion: If a free plugin meets your needs, use it. If you require more features, performance, and support, investing in a premium plugin like Element Pack Pro is the best approach.
- How to Uninstall and Delete Unused Plugins Properly
Why It’s Important:
- Deactivated plugins still take up space and may create security risks.
- Simply deactivating a plugin does not remove its files or database entries.
Steps to Uninstall a Plugin Completely:
- Go to WordPress Dashboard → Plugins > Installed Plugins.
- Find the plugin you want to remove and click Deactivate.
- Once deactivated, click Delete to remove it.
- Use WP-Optimize or Advanced Database Cleaner to remove leftover plugin data from your database.
If a plugin cannot be removed via the dashboard, delete it via FTP by navigating to wp-content/plugins/ and removing the plugin folder manually.
Conclusion
Installing plugins in WordPress is essential for enhancing functionality, but choosing the right installation method is just as important. Throughout this guide, we covered:
- Installing free plugins directly from the WordPress repository – the easiest and most recommended method.
- Manually uploading premium plugins – necessary for paid plugins not listed in the repository.
While plugins extend WordPress capabilities, using too many or unreliable ones can harm performance and security. That’s why it’s crucial to install only well-maintained, trusted plugins and keep them updated to avoid vulnerabilities.
Element Pack (both free and premium) is an excellent example of a trusted, feature-rich plugin for Elementor users. Instead of installing multiple separate plugins, Element Pack offers 80+ widgets, templates, and integrations in one package improving performance while reducing plugin bloat.
Ready to enhance your WordPress site?
- Download Element Pack Free for essential widgets.
- Upgrade to Element Pack Pro for advanced features and priority support.