Effortless navigation with rich menu options
Visual product choices boost sales fast
Personalized content adapts in real-time
Seamless scrolling for better UX flow
Instant content duplication saves time
Quick access to powerful design elements
Ready-made templates speed up design
Advanced custom fields for flexible data
Clone sites easily without hassle
Crisp, scalable graphics for all screens
Rebrand tools for a professional look
Show or hide content with precision
Engaging depth with smooth motion
Add clear notes and annotations easily
Helpful hints improve user interaction
Animate elements with stylish flair
Keep important sections always visible
Full control with custom code tweaks
Optimize files to boost site speed
Crafted page templates to help you get started with your landing page just by dropping a starter design
Ready Blocks comes with a variety of layouts and design elements, such as headers, footers, and widgets etc.
Pre-designed headers with lucrative styles that are suitable for various niche websites and design tastes
A helpful collection of footer designs to help you create an instant attractive footer on your landing page
Find us 24/7 at your service. We are glad to help.
Detailed guidelines available for every features at BdThemes
Learn something new, stay informed about WordPress, Web Design and more
Here are some of the key milestones in my development:
Learn product usage, WordPress tips & tricks from our videos
Earn hefty commissions by joining us in the promotion
Widget Idea Share is a great way to find similar widgets that you can improve.
Certainly! If you need to get in touch with us feel free to reach out
Build any WordPress form in minutes with Sigma Forms.
Coming Soon & Maintenance Mode Page Builder Plugin
Easily make websites accessible with One Accessibility
Display client testimonials to enhance trust and credibility.
Zoloblocks helps craft stunning Gutenberg-based websites.
Most superior Slider in the Era of Elementor Slider
The only Compatible blogging widgets in Elementor for any Blog
Build a next-gen WordPress eCommerce website for business
Organize your photos in a different angel every time with Elementor
Boost engagement and increase sales using Spin Wheel.
Powerful AI Image Generator Plugin for WordPress by ChatGPT
Get 360° Augmented Reality for WooCommerce today!
Copy & Paste any web design you like just with 2 clicks!
A fully functioning theme for elementor with unlimited options
Smart, Clean & Flexible Block Theme for Gutenberg
Dark Reader plugin ensures eye-friendly web reading.
WooCommerce one-page checkout to boost conversions.
Access 100+ premium WordPress plugins with lifetime updates and dedicated support.
Effortless navigation with rich menu options
Visual product choices boost sales fast
Personalized content adapts in real-time
Seamless scrolling for better UX flow
Instant content duplication saves time
Quick access to powerful design elements
Ready-made templates speed up design
Advanced custom fields for flexible data
Clone sites easily without hassle
Crisp, scalable graphics for all screens
Rebrand tools for a professional look
Show or hide content with precision
Engaging depth with smooth motion
Add clear notes and annotations easily
Helpful hints improve user interaction
Animate elements with stylish flair
Keep important sections always visible
Full control with custom code tweaks
Optimize files to boost site speed
Crafted page templates to help you get started with your landing page just by dropping a starter design
Ready Blocks comes with a variety of layouts and design elements, such as headers, footers, and widgets etc.
Pre-designed headers with lucrative styles that are suitable for various niche websites and design tastes
A helpful collection of footer designs to help you create an instant attractive footer on your landing page
Find us 24/7 at your service. We are glad to help.
Detailed guidelines available for every features at BdThemes
Learn something new, stay informed about WordPress, Web Design and more
Here are some of the key milestones in my development:
Learn product usage, WordPress tips & tricks from our videos
Earn hefty commissions by joining us in the promotion
Widget Idea Share is a great way to find similar widgets that you can improve.
Certainly! If you need to get in touch with us feel free to reach out
Build any WordPress form in minutes with Sigma Forms.
Coming Soon & Maintenance Mode Page Builder Plugin
Easily make websites accessible with One Accessibility
Display client testimonials to enhance trust and credibility.
Zoloblocks helps craft stunning Gutenberg-based websites.
Most superior Slider in the Era of Elementor Slider
The only Compatible blogging widgets in Elementor for any Blog
Build a next-gen WordPress eCommerce website for business
Organize your photos in a different angel every time with Elementor
Boost engagement and increase sales using Spin Wheel.
Powerful AI Image Generator Plugin for WordPress by ChatGPT
Get 360° Augmented Reality for WooCommerce today!
Copy & Paste any web design you like just with 2 clicks!
A fully functioning theme for elementor with unlimited options
Smart, Clean & Flexible Block Theme for Gutenberg
Dark Reader plugin ensures eye-friendly web reading.
WooCommerce one-page checkout to boost conversions.

Access 100+ premium WordPress plugins with lifetime updates and dedicated support.
Hello everyone, in this piece of article, we are going to learn about how to create a landing page in WordPress using Element Pack and Elementor Page builder. This is not about examples but a walk-through with tips and tricks to build the perfect page of your desire.
There are several ways you can create a landing page. Such as:
One extra plugin means extra overhead while elementor with Element Pack can bring the feature of 100’s of the plugin just in 2 plugins. The third-party solution can bring some extra features yet again can limit you with unlimited possibilities that can be achieved through Element Pack and Elementor. In this article, we are going to describe the easiest way to create landing pages, extra design from element pack that makes a landing page even better. We will walk you through the process.
Nothing is better, to start building your Landing Page than quickly review its main objectives and features.
Landing Page: the key element for conversion on your website
The landing page is a web page that the user lands to enter a website. In terms of action, this is different from a website, a blog or an article because these pages are normally linked from external sites and are almost never the home page of a website.
Landing pages clearly differ in their function from other types of web pages, since they have a very simple objective, usually oriented to a single action. When a user notices the home page or home page of a website, they can see that there are too many links and there are different actions to perform on the page. The home pages of the websites are not designed for the user to perform a single specific action. Even many corporate websites are more like a brochure focused on one-way communication. On the other hand, blogs are designed to give information on various topics that interest users. Blogs also have different links and there are different ways by which a user can move through it.
The landing pages usually have a goal: to achieve a conversion or lead. These pages are usually effective when traffic is conducted from ads or specific areas of a web page or blog related to what the user is looking for.
It could be defined simply as a single web page that appears in response to clicking on an optimized search result in a search engine or an online ad.
When you get the traffic on your landing page, you can promote:
In fact, the goal of the landing page is to convert your visitors, providing them with proof that your offer presents value to them. If your website is working well, your visitors will leave information about them by filling out the form there.
Even though all the Landing Pages are different, we still notice some elements that appear in an inevitable way. A landing page, most cases, don’t have any navigation bar or footer. The purpose of this page is to keep your visitor on it, without distracting it from the rest of the site, to fill out your form or click on your call to action. In some cases, we may have a header or footer or both of them. It depends upon the requirement/objectives of the website.
A landing page also presents a clearly established value proposition. In the form of blocks of text, and possibly tables that present their prices, you explain to your visitors what is in the key if they fill out your form or buy your offer.
Another key element of a Landing Page: the presence of a form or a call to action, depending on the format of the promoted offer.
So, the landing page we will build will have the following segments.
The landing page that we are going to create will have:
To make the landing page successfully, you will need:
Let’s build the Landing Page using Element Pack and Elementor
Prior to the actual design of our landing page, we need to set up the defaults for our landing page. By default, I mean the primary and secondary colors, fonts, etc.
To do so, we have to choose the elementor canvas page layout.
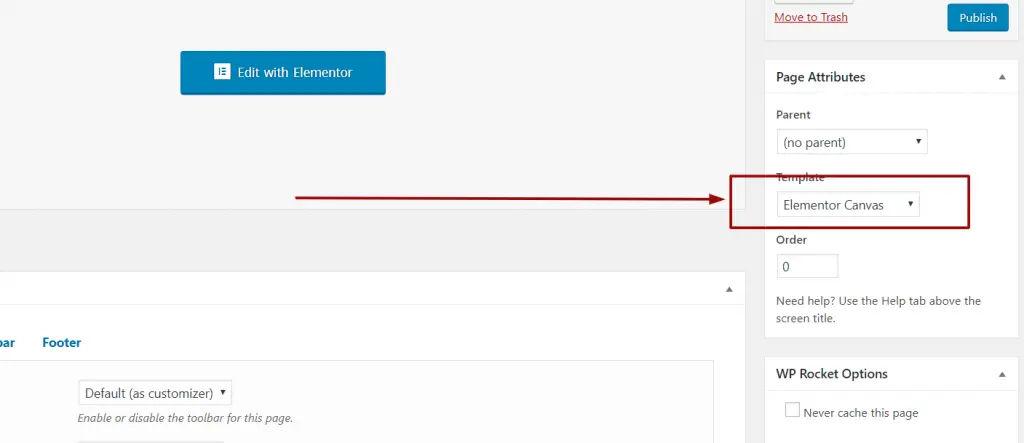
Canvas layout gives us a very clean structure for our content. Once selecting the canvas, click on the save draft button. Then click on the “Edit with Elementor” button.
Now from the primary settings, we will set up the colors and fonts for our landing page. You can select whatever fonts and color that suits your requirements.

You can select your desired color through the Color Picker settings. By doing so, you can quickly select your desired color whenever you need it on your landing page.
Our top hero section will contain background image, text, icons and buttons to attract visitor’s attention.
The specialty of this section will be a full section background image, SVG icons/image for the section with a heading. And a nice description with 2 call-to-action buttons.
We will take a section with 3 columns 25/50/25
Then we will give a background to the section.
In the middle column, we will put some inner columns to match our design as follows.
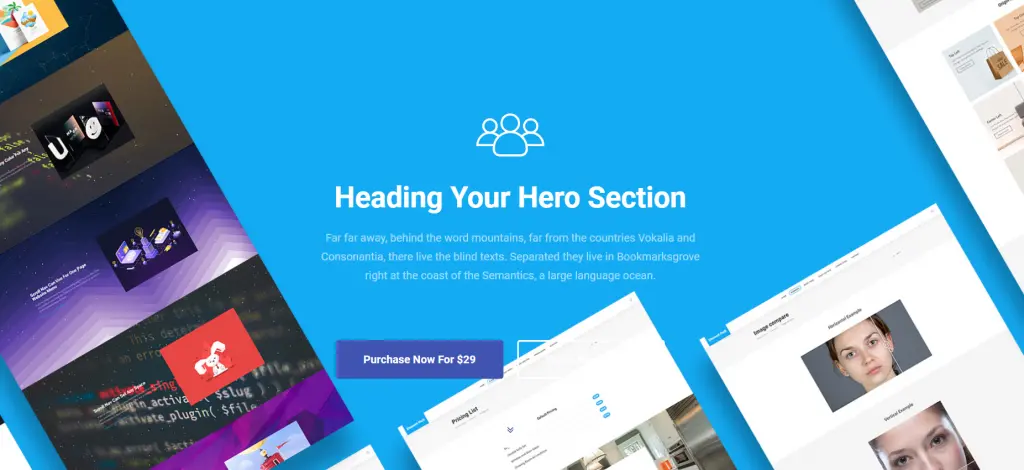
This whole design is available as a ready block in element pack pro plugin. Have a look at here:
Once you have purchased and downloaded. Check the demo content folder. Then go to the ready blocks folder. Go to the hero block and import the desired block into our elementor template.
If you don’t know how to import a template, please watch this video.
Our About us section will contain 2 columns. One of them will have a heading with a paragraph and button to the contact form. The next column will have an image.
We will take a section with 2 columns 50/50
In the first column, we will take a heading and a content block.
In the final column, we will put an image to make it look nice. The image should reflect teamwork.
Our final design will look like the following:
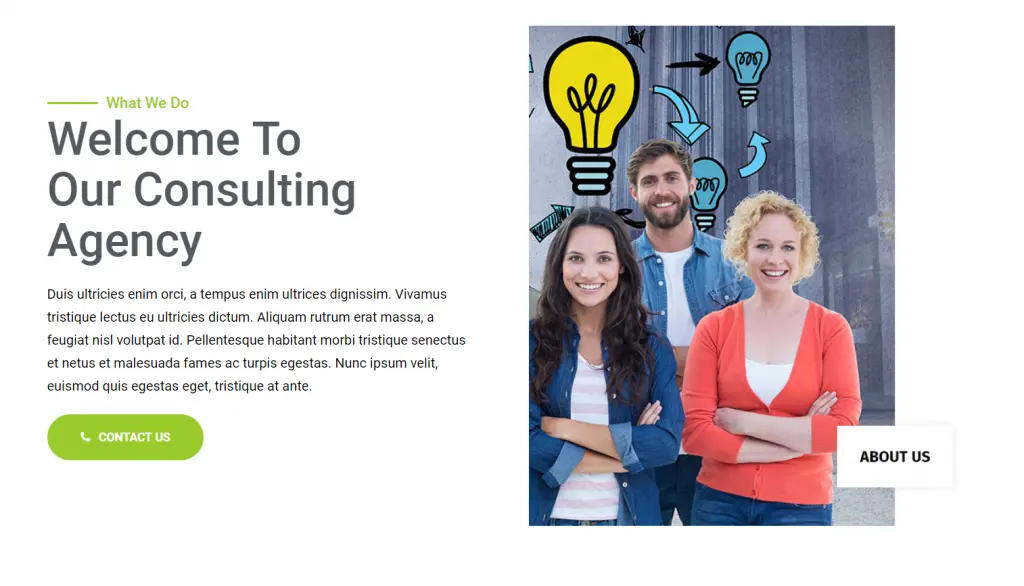
This design along with some other cool attractive design is available in Element Pack Pro ready blocks. Get it now. Look at the demo here:
Our feature section will contain 2 columns. First Column will have progress bar based design and the next Colum will have features with icons and simple description
We will take a section with 24 columns 50/50
Our final design will look like the following:
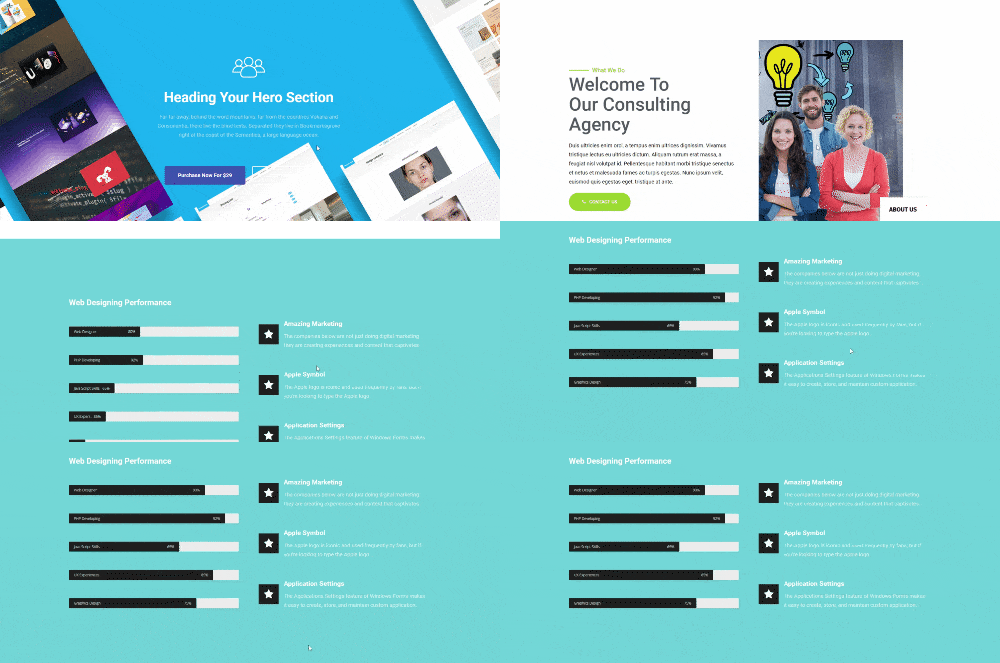
This design along with some other cool attractive ready blocks are available in Element Pack Pro ready blocks. Get it now. Look at the demo here:
We will have a heading before the actual testimonial begins. Our testimonials section will contain 2 columns. Each column will have a picture and description. This will be an advanced box design
We will take a section with 2 columns 50/50
Our final design will look like the following:
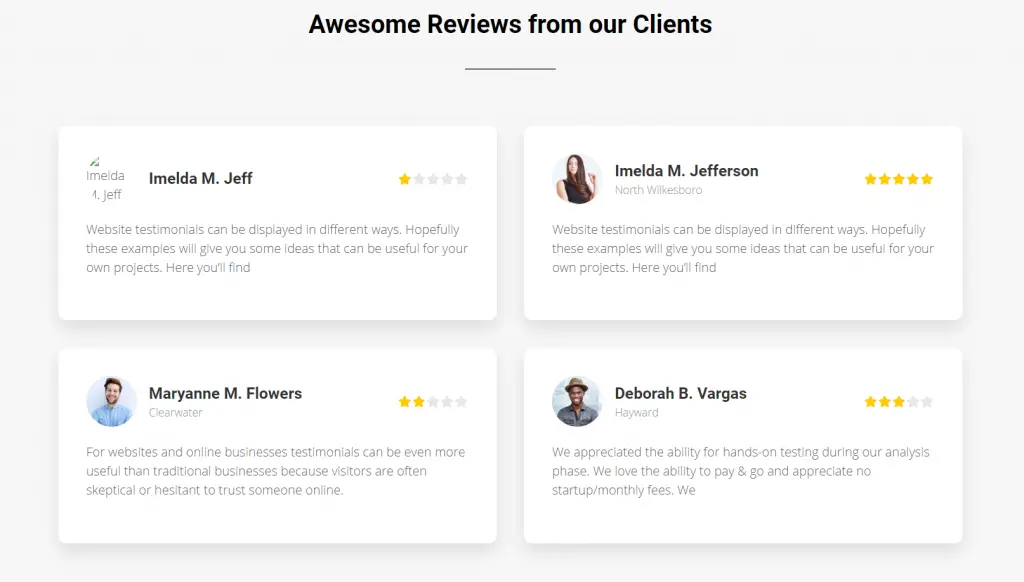
Find out some other awesome ready pages and ready blocks offered by Element Pack – Ultimate addons that you will need. Look at the demo here:
In our pricing section, we will have 2 plans. For that, we will select the pricing table module. We will first import the design from the element pack pro demo content. From there we will design the pricing plan according to our needs.
Please go to the demo content page of your Element Pack Pro downloads that you got from the account manager. Then import the template and add it into a section.
Our final design will look like the following:
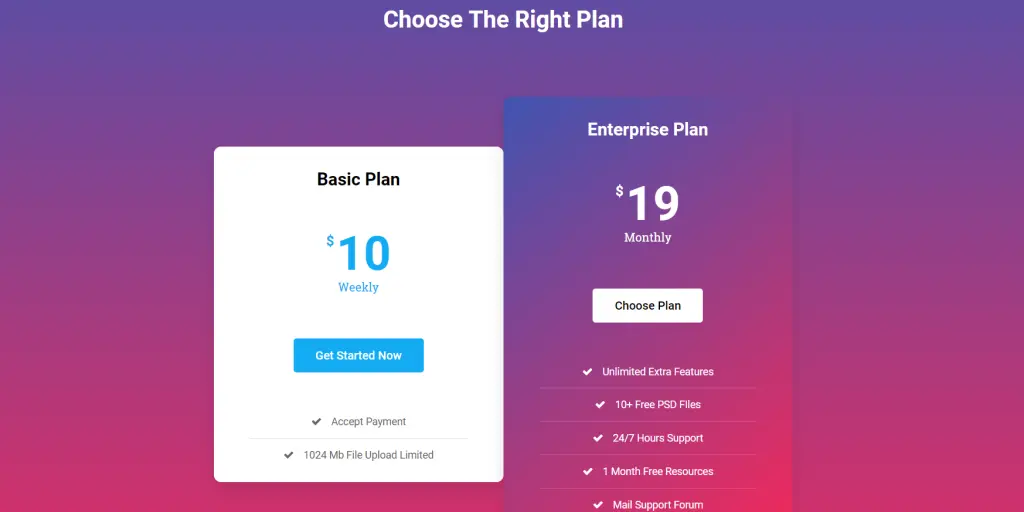
Find out some other awesome ready pages and ready blocks for pricing plans offered by Element Pack – Ultimate addons that you will need. Look at the demo here:
The lead portion is very important. We have put a contact form in this section. You can put any lead magnet like a MailChimp or others.
Please go to the demo content page of your Element Pack Pro downloads that you got from the account manager. Then import the template Contact form template and add it into a section. Once imported, please add the Element Pack Pro Contact form widget on the right column.
And update the writings on the left column. Oh forgot to mention, we have added a background image on the parent section.
Our final design will look like the following:
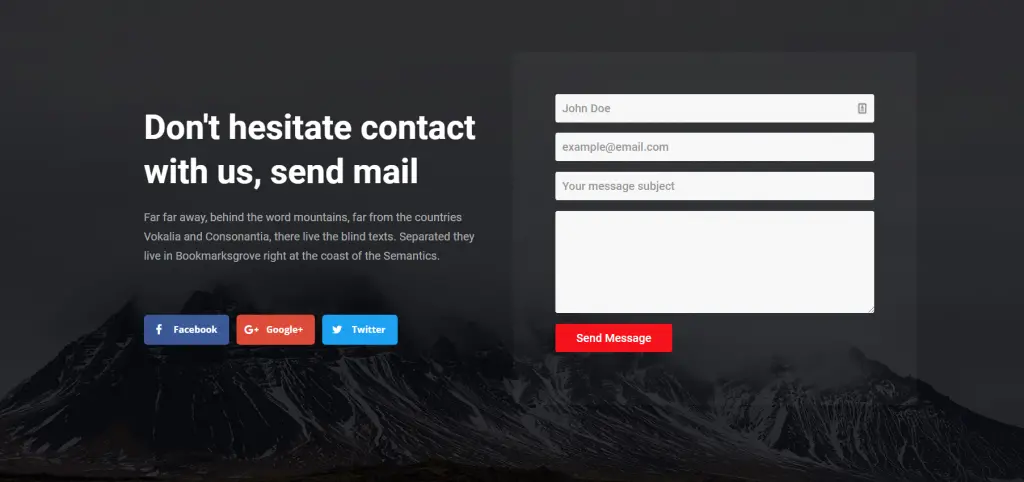
Find out some other awesome ready pages and ready blocks for Contact Form and Lead pages offered by Element Pack – Ultimate addons that you will need. Look at the demo here:
Here is our Final Design.

We have just shown a few of our ready-made blocks in this article. We have plenty! We have a huge collection of ready pages that contains landing pages too.
Please check out them in our Element Pack Demo pages. Have blast with your creative ideas through landing pages.
Largest Elementor Templates pack with the most user-friendly UI and 300+ useful Elementor widgets. Build websites from zero to 100% perfection in no time.
This website is powered by Element Pack Pro and Rooten Theme.
Copyright © 2025 BdThemes. All Rights Reserved.